Tying a Round Paracord Braid
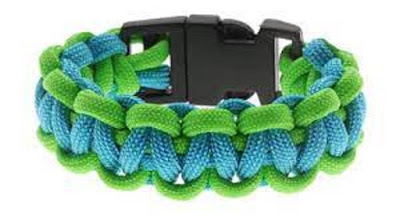
Paracordist in this blog tutorial I show you how to braid the most basic round
braid used in the paracord crafts. Here it is tied with the standard 550 paracord. A round braid is a type of braid used for making jewelry, slings, straps, etc. out of string, yarn, twine, cord, leather, and more. This braid requires an even number of strands, but four or eight are most common. Choose the number of strands and the colors you want to use, then get started on your own 4- or 8-strand round braid.
 1
Choose the colors for your braid. Decide on the colors that will appear in your round braid. Select just one or two, or up to as many as four or eight different colors, depending on which type of braid you do.
For a 4-strand round braid, one or two colors are typically used in different configurations, but you can use up to four different colors for each strand if you wish.
For an 8-strand braid, typically one or two colors are used to create patterns, but you can use as many as eight different colors for each strand. To start this we need to gather the strands together to have a starting point. This can be done in various ways.
Tie strands together at the end. Tie the pieces of material you will use for your braid together at one end. Use a simple overhand knot (tying all four pieces around themselves) to secure them together.
You can fold over one longer piece of your material to create two strands, in which case you will tie together the loop ends of the folded pieces. Remember that this will create two strands of the same color when you plan out what colors you will use.
Don’t worry about how neat or perfect this knot is, as you will likely redo it or use a fastening instead to complete your final braided item. Here using a overhand knot pictured above.
1
Choose the colors for your braid. Decide on the colors that will appear in your round braid. Select just one or two, or up to as many as four or eight different colors, depending on which type of braid you do.
For a 4-strand round braid, one or two colors are typically used in different configurations, but you can use up to four different colors for each strand if you wish.
For an 8-strand braid, typically one or two colors are used to create patterns, but you can use as many as eight different colors for each strand. To start this we need to gather the strands together to have a starting point. This can be done in various ways.
Tie strands together at the end. Tie the pieces of material you will use for your braid together at one end. Use a simple overhand knot (tying all four pieces around themselves) to secure them together.
You can fold over one longer piece of your material to create two strands, in which case you will tie together the loop ends of the folded pieces. Remember that this will create two strands of the same color when you plan out what colors you will use.
Don’t worry about how neat or perfect this knot is, as you will likely redo it or use a fastening instead to complete your final braided item. Here using a overhand knot pictured above.
 2 Secure the end of your material to something. Fasten the knotted end of your strands to an object that will keep them firmly in place while you are pulling and tightening the strands to create the braid. Tape the end to a work surface, loop it over a hook, pin it to your pant leg, or whatever method works for you.\
If you prefer to work on a flat surface to help keep your strands in order, opt for taping the end down to a table or other horizontal surface that your material can lay flat on.
If you prefer to keep tension on the strands and hold onto and manipulate them with your fingers the whole time, opt for suspending the end from a hook or an angled surface that you can pull the strands out from.
2 Secure the end of your material to something. Fasten the knotted end of your strands to an object that will keep them firmly in place while you are pulling and tightening the strands to create the braid. Tape the end to a work surface, loop it over a hook, pin it to your pant leg, or whatever method works for you.\
If you prefer to work on a flat surface to help keep your strands in order, opt for taping the end down to a table or other horizontal surface that your material can lay flat on.
If you prefer to keep tension on the strands and hold onto and manipulate them with your fingers the whole time, opt for suspending the end from a hook or an angled surface that you can pull the strands out from.
 3 Arrange your colors for a 4-strand braid pattern. Decide on how you’d like your colors to appear once they are braided, and arrange the strands accordingly. Two colors on a 4-strand round braid can create a spiral or diamond shapes, depending on what order the colored strands are in when you begin.
Begin with two strands of the same color in the middle, and the outside two strands in a different color, for a pattern that will look like a spiral. In other words, you can hold one strand of each color in each hand if you are holding onto the strands to braid.
Begin with two strands of one color on the left and two strands of another color on the right for a pattern that will look like diamond shapes or a square with four colored sides. In other words, hold one color in one hand and one color in the other if you’re holding onto the strands the whole time to braid. Taking a random strand we start.
3 Arrange your colors for a 4-strand braid pattern. Decide on how you’d like your colors to appear once they are braided, and arrange the strands accordingly. Two colors on a 4-strand round braid can create a spiral or diamond shapes, depending on what order the colored strands are in when you begin.
Begin with two strands of the same color in the middle, and the outside two strands in a different color, for a pattern that will look like a spiral. In other words, you can hold one strand of each color in each hand if you are holding onto the strands to braid.
Begin with two strands of one color on the left and two strands of another color on the right for a pattern that will look like diamond shapes or a square with four colored sides. In other words, hold one color in one hand and one color in the other if you’re holding onto the strands the whole time to braid. Taking a random strand we start.
 Move the leftmost strand underneath the other three strands. Lay out your strands or hold them in your hands so they are separate from each other. Use the strand on the far right and pass it under the two strands in the middle.
If it helps you, you can think about labelling the strands from left to right as A, B, C, and D when you begin. Bring the D strand underneath C and B so that the order is now A, D, B, C.
Either place your strands carefully on a flat surface or hold them tightly in your hand, as they must remain in order throughout the braiding.
Move the leftmost strand underneath the other three strands. Lay out your strands or hold them in your hands so they are separate from each other. Use the strand on the far right and pass it under the two strands in the middle.
If it helps you, you can think about labelling the strands from left to right as A, B, C, and D when you begin. Bring the D strand underneath C and B so that the order is now A, D, B, C.
Either place your strands carefully on a flat surface or hold them tightly in your hand, as they must remain in order throughout the braiding.
 Move the rightmost strand underneath the two middle strands. Lay out your strands or hold them in your hands so they are separate from each other. Use the strand on the far right and pass it under the two strands in the middle.
If it helps you, you can think about labelling the strands from left to right as A, B, C, and D when you begin. Bring the D strand underneath C and B so that the order is now A, D, B, C.
Either place your strands carefully on a flat surface or hold them tightly in your hand, as they must remain in order throughout the braiding.
Move the rightmost strand underneath the two middle strands. Lay out your strands or hold them in your hands so they are separate from each other. Use the strand on the far right and pass it under the two strands in the middle.
If it helps you, you can think about labelling the strands from left to right as A, B, C, and D when you begin. Bring the D strand underneath C and B so that the order is now A, D, B, C.
Either place your strands carefully on a flat surface or hold them tightly in your hand, as they must remain in order throughout the braiding.

 Wrap that strand over and between the two middle strands. Take the rightmost strand that you just moved under the two middle strands. Wrap it over one of those middle strands so that it falls in between the two of them.
If you’re using letters to label your strands, you would be taking the D strand and placing it over B so that it is in between B and C. The order from left to right would then be A, B, D, C.
Tighten the strands up toward your end knot so that the braid stays even. Make sure the strands stay spread out in the same way as when you began, even though some will have changed positions.
Wrap that strand over and between the two middle strands. Take the rightmost strand that you just moved under the two middle strands. Wrap it over one of those middle strands so that it falls in between the two of them.
If you’re using letters to label your strands, you would be taking the D strand and placing it over B so that it is in between B and C. The order from left to right would then be A, B, D, C.
Tighten the strands up toward your end knot so that the braid stays even. Make sure the strands stay spread out in the same way as when you began, even though some will have changed positions.


 Bring the leftmost strand under the two middle strands. Take the strand that’s on the far left and bring it underneath your current two middle strands. This mirrors the same first step you took with the strand on the right.
Your lettered strands were A, B, D, C from left to right after tightening the first side. You will now take the A strand and bring it underneath B and D. Thus the new order will be B, D, A, C.
Remember to keep all strands carefully in place while you braid, whether laying them out neatly on a table or holding them firmly in your hands.
Bring the leftmost strand under the two middle strands. Take the strand that’s on the far left and bring it underneath your current two middle strands. This mirrors the same first step you took with the strand on the right.
Your lettered strands were A, B, D, C from left to right after tightening the first side. You will now take the A strand and bring it underneath B and D. Thus the new order will be B, D, A, C.
Remember to keep all strands carefully in place while you braid, whether laying them out neatly on a table or holding them firmly in your hands.


Comments
Post a Comment