How to Make Your Own Paracord Jig
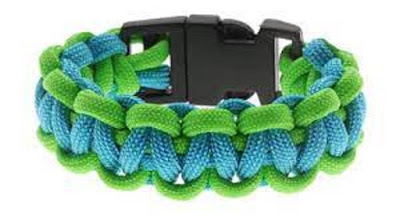
Are you a lover of paracord bracelets? And you are always not satisfied with the style and price of the paracord bracelets you see in stores? Well, with the help of a paracord jig, you can make your own just how you want it.
In this article, we have put together this tutorial for a paracord jig project that you can DIY easily. The making process is pretty much basic and easy to follow.


With that said, let’s start with the first step: planning a paracord bracelet jig.
Planning our jig
There are a few aspects worth considering when making a jig. Since it is made by you, you can customize just about everything, from the wood used, to the very functionality of the jig.
If we focus on making a basic design, there are two aspects of the jig that we should consider:
- the width
- the length
Width

The wider the jig, the more different buckle sizes you can mount on it. This means that generally, a wider jig will have more buckle types you can use. A smart way to get around the width restriction is to have your middle and top part that have the buckles mounted interchangeable or able to rotate.
Length

The length determines how, well long the items you make can be.
Usually, you should plan for 10-12 inches of working length for most bracelets. You can easily make a longer jig though, which can also enable you to tackle larger projects, such as making dog collars or even belts.
Travelling
One more thing I would like to point out is that for those on the road a lot, you may want to design your jig to be fairly short, narrow and lightweight. Maybe even designed to be stored in a compact way by being able to disassemble it.
Supplies
To make the jig you will need a number of supplies. Here I list the ones I would use. Any tool, equivalent in function can work just as well.
- wood- you can reuse any wood you have lying around or buy it specifically for the project. All in all, you will need 2 longer pieces for the base of the bracelets, 5 smaller pieces, one for the sliding, middle part and two for the top and bottom each. I also used smaller, thinner pieces to make the sides to guide the middle part (seen below).
- a saw- needed to cut the wood to size
- sand paper- the unsung hero of the workshop enables you to smooth out the rough edges
- glue- I recommend wood glue to hold your pieces in place while you insert the wood screws
- wood screws- needed to hold the jig together. Smaller wood screws are also needed to attach the buckles to the top and middle parts of the jig.
- a drill- either a power drill or a hand operated one, depending on what you feel comfortable working with. We will need it to pre-drill the holes for our screws to prevent the wood from splitting
- a screw for the middle of the jig, used to secure it in place
- two washers, for the top and bottom of the middle part
- a wing nut, used to lock in the screw
- a tape measure
- a ruler and a marker
- cable clamps (recommended)- for attaching the buckles
- buckles- attached to the top and middle part of the jig
- screwdriver
- a protective coating and finish. I like to use raw linseed oil, since it is natural.
Building our jig
Listing the important aspects of a jig and the supplies needed is not enough to get the full picture. So, let’s see how a jig is made, step by step!
Step 1
The first step is cutting the wood and gluing the frame together. As previously mentioned, the working surface should be at least 10-12 inches long to allow you to make bracelets, more for collars and belts.

The jig is made with 7 parts of wood:
- two longer pieces for the base
- one piece for the middle, moving part
- four smaller pieces for the top and bottom of the jig
These pieces are then glued together:


Step 2
We now need to mark and drill the holes at the top and bottom of the jig. These holes will guide the wood screws as well as prevent the wood from splitting. Use a hand or power drill.
Finally, longer wood screws are screwed in.


Step 3
After the screws have been inserted we can now attach the middle part. For this we need two washers, a wing nut and a long screw.


Step 4
We can now screw in our buckles to the top and middle part. If you have any cable clamps, those work great.
Pay attention to where you place your buckle, especially for the next step of marking the lengths. Some pieces of the buckle add to the length of the bracelet.

Step 5
Marking down the lengths can be very helpful. Make sure you also account for the buckle length.
You can use metric, inches or both.

Step 6- optional
Sanding the jig will provide a nice feel to the jig. Using linseed oil or any type of finish can give it a nice finishing look and protection.
As you can see from the images, I have also attached smaller pieces of wood for the sides of the jig to enable the middle part to slide more comfortably.
Note the top side of the jig has been reinforced with two thin pieces of wood, which guide the middle part on the way up and down.
In conclusion
The jig is now made and I hope that it will serve you well for making your bracelets.


Comments
Post a Comment