QUAD-STRAND TWIST NECKLACE
I think one of the luxuries of paracord is using colorful materials to knot with— especially when working a twist of repeating half knots. I really enjoy this technique when I can indulge in making something that showcases both color and form, like this quad-strand necklace.

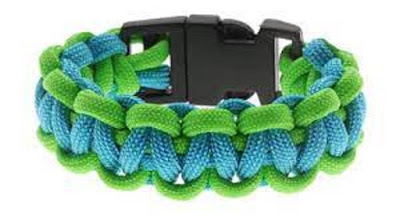
This can be a 1,2,or 4 color necklace or bracelet that is slim yet looks good
This is a necklace I made from 550 paracord. I had seen some necklaces that people made but they all seamed to big or not practical. I wanted something slimmer. So I searched the internet for a weave and came up with the 4 Strand Round Weave. I had never seen a paracord necklace made this way so I just went to it and this is what I got. Its not terribly difficult and its pretty fun. It's a fun craft to make with the family too. I made my wife one too. Although it looks good, it can also be taken apart and used in a survival situation. I hope you enjoy it and I'd love some feedback! Sorry about the marginal picture quality. My camera is not that great.

Step 1: Materials
For this project you will need:
* Paracord(read on for length)
*Scissors( or other cutting device)
*A lighter to fuse the rope
Step 2: Mesure Your Neck
To Measure you neck, take a piece of scrap paracord (or other sting ect.) and wrap it around your neck. Figure out how you want the necklace to fit and adjust the paracord acordingly. I went for more of a choker style neclace but its up to you. Mark the length and measure the cord. Now to find out the amount of paracord you'll be using use this formula- 1in. of necklace = 4 1/2 in. of each color of paracord. For example, I'm making a 15in. necklace, then I'll need 67.5 in of each color to make the necklace. I would also recommend adding 1/2 a foot to a foot to each measurement just so you have some wiggle room. Cut and fuse the paracord.
Step 3: Start the Weave


Now to start the weave, fold both the ropes in half in the center. Now lay the ropes over each other. Begin by passing both ends of rope 1 (the red rope) under rope 2 (the tan one). PULL TIGHT! This is the key in the weave. ALWAYS KEEP TENSION ON THE WEAVE!!!!! Now, pass rope 2 under rope 1. Continue with this pattern. I hold the rope with the unwoven strands below me( I find it much easier). After you have part of the necklace finished stop weaving and pull the top of rope 1 and form a loop. The loops diameter should be about 3/4 in. If you are having trouble with the weave see http://www.youtube.com/watch?v=UtWWA6MQXGE .
Step 4: Keep Going!

Continue the weave until you have reached the desired length.
Step 5: Finishing the Necklace

Now this is the tricky part, take rope 2 and tie an over hand knot. Make it tight! Now cut rope 2 for fusing. Now, when I fused the rope I got the end hot enough so it was a liquid but not runny or on fire. I then took the side of my scissors and flattened the end of the rope. When you do this do it as fast as you can without being reckless. What you should have now are the ends of rope 1. Now, take the ends of rope 2 and tie an overhand knot with both strands. Now, cut and fuse the ends of the rope and....... You now have your very own paracord necklace!

Step 6: The Finished Product
This is the finished product. It can be used as a stylish necklace or a survival necklace as well. I hope you liked this tutorial and I would love feedback negative or positive and anything I need to fix!


Comments
Post a Comment