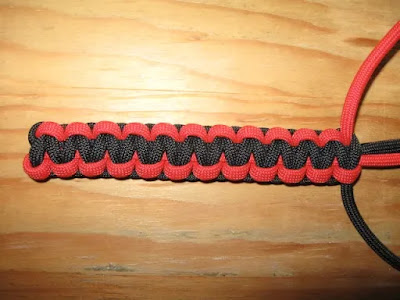
Posts

Showing posts with the label keychains

SNAKE WEAVE

Image
Sometimes knots are not so much tied as woven or plaited, and the snake weave is a good example of this. Starting with a box knot, it becomes a woven braid resembling Celtic designs based on intertwining snakes. 1 Begin with a box knot: make a loop in the middle of the cord so that the right-hand cord is on the top. Bring the right-hand cord up behind the loop. 2 Weave the left-hand cord over, under and over the looped cord to come out at the right-hand side. Rotate so that the cord tails are facing down. 3 Holding the knot at the cross point at the top, pull the bottom loop down to the required length of the snake weave panel. Pull the cord ends out to the side to firm up the knot at the top. 4 Twist the bottom loop so that the left side is over the right. Take the right-hand cord over the front of the loop. 5 Weave the left cord under, over and under the long loop to come out at the right-hand side. 6 Repeat from step 4 until you are close to the bottom of the loop. Adjust the kn

Two Color Paracord Solomon Bar

Image
The Two Color Paracord Solomon Bar is the same knot used in making the Survival Bracelet. We are just going to add a little different twist to the popular bracelet. We will make it with two colors. Step 1: Layout Start with your two colors of paracord, lay them out as shown. One color on the left and the second color on the right. Step 2: Begin Your Knot Take your left cord, make a loop with the running or working end of the paracord, going in front of the knot. Take your right cord, loop around the the left cord running or working end, go behind the knot and through the loop of the left cord. *** you can start the knot on a buckle or key ring if you want to, I am just showing how the two colors will look... *** Step 3: Pull Tight Once you pull the knot tight you should start to see the familiar knot pattern of the Survival Bracelet. Step 4: Continue Tying the Knots Continue tying the knots Step 5: After a Few More Knots By now you can see the Solomon Bar forming... In the example y

Paracord Knots: Knots That You Can Learn Easily

Image
Tying paracord knots can be fun, yet it can sometimes be a challenging task for a beginner. Learning what to do to get the right results can take some effort on your part. Therefore, following an expert guide can work wonders in your favor and you can keep the skill for life. Here are knots you can easily learn using paracord and chances are they will come in handy when you are outdoors camping. Knot 1: The cobra knot The cobra knot is widely used by military personnel. Whenever a pull-ring is attached to it, the knot is perfect to be used as a Girth Hitch. See also: YouTube: Tying It All Together The cobra knot is a very easy tie to learn. Your first step is to gather two different paracords to make the knot. Materials you need are: A sharp knife A buckle Cigarette lighter 2 different colors paracord Here are the simple instructions: Take both strings in your hand and hold them straight with your fingers alongside each other. Take hold of the left cord with your hand and see

How to Make Paracord Keychains

Image
DIY Paracord Keychain Ideas with Instructions Parachute Cord popularly known as paracord is crafter’s favorite paracord project these days. Explore with a variety of paracord ideas for paracord projects which are handmade and a cool style statement for preppers and campers! Learn how to make amazing Paracord Keyhains with step-by-step instructions in the tutorials given below! You can be creative and design wonderful keyfobs to hook on your belts or bags! Paracord Basic Project Requirements Paracord Keyrings Buckle Measuring Tape Scissors Lighter Lashing Needle Jig Paracord Heart Keychain Instructions This tutorial teaches you how to make a Celtic heart knot keychain. It is a quick easy to make design and very cute to carry your keys. An ideal gift for Valentine’s Day! Step 1: To Fashion the Heart, Fold the Cord Over Itself to Create a Small Loop. Step 2: Take the Right Working C

Royal Crown Sinnet

Image
The Royal Crown Sinnet is the product of Crown Knots and Wall Knots stacked on top of one another. Thicker than most 4-strand sinnets, the tie’s interlocking parallel lines are accentuated by the contrasting cords used. Cord Used: Two 6 ft. (1.8 m) Cords = 3.5 in. (8.9 cm) Key Fob Component Parts: Crown Knots + Wall Knots (Uncollapsed) + Contrasting Cords. 1. At the middle of the first cord, make a counterclockwise loop. 2. Lace the second cord through the loop, until its middle is reached. 3. Flip the piece over, vertically, slide your forefinger into the loop, and extend the second cord laterally. 4. Arch the second cord ends over the first, in opposite directions, right cord above left. 5. Weave the lower cord end over the arch above it. 6. and through the crook of the second arch. 7. Weave the upper cord end over the arch below it. 8. and through the crook of the second arch. Tighten the Crown Knot made, firmly. 9.

Live Chat