Posts

Showing posts with the label tutorials

Paracord Cobra Weave Ring

Image
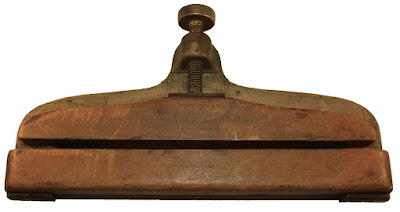
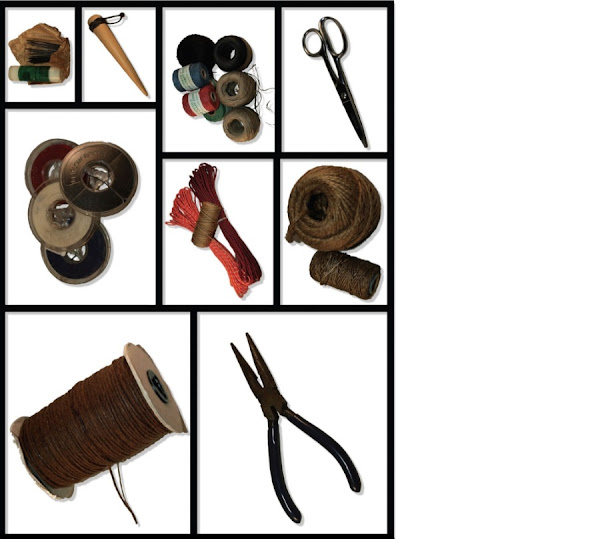
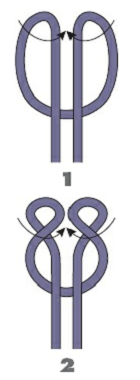
Cobra Weave Paracord Ring Supplies Materials Steps to Weave the Cobra Ring Step 1: Begin by cutting a lengthwise slot along the pvc, conduct, or tubing. I got a used piece of pvc coupling from a plumber friend of mine. I also used different sizes for ring measurements. Step 2 I used 36 inches of the braided line, but could use any type line. For example gutted paracord line, or #95 paracord in any color. The line is weave around the jig. The jig is made from any size pvc, conduct, or metal pipe, cut to a 2 inch length with a 1/4" slot cut down the length of it. The ring is tied around the jig in a cobra weave style. You can cut the slot in the jig using whatever is convenient, I used a table saw, if you buy a coupling from Home Depot have them cut the slot for you. Follow steps in the images: Step 3: After clove hitch I take the right strand and loop over top and around the right side of the jig. Then bring in back of the other hanging strand,

Tricks to Learn How to Tie Turks Head Knots.

Image
Practice the knots you know by using them as much as possible. The more you use them the more likely you will use them. This will also help you find the ones you prefer for different situations. Setting up tents or shelters. Tying down a load in a truck bed. Securing a boat to a dock or post. Games or tricks using knots. Making decorative items to use. TURK’S HEAD KNOTS The Turk’s Head Knot is what truly embodies a decorative knot for many people, and—oh, what magic that term “Turk’s Head Knot” evokes! The would-be knot-tyer wants to know its mysteries, the novice wants to practice it once again just to solidify their new knowledge, the practiced knot-tyer wants to know how to expand a Turk’s Head, and there are those who profess to be able to tie any Turk’s Head Knot in any fiber all done in hand! The dreams and wonders that this knot tells! One could easily fill a book or several books on the subject but we have limited ourselves to just this article. With that in mind, I am

Paracord Knots: Knots That You Can Learn Easily

Image
Tying paracord knots can be fun, yet it can sometimes be a challenging task for a beginner. Learning what to do to get the right results can take some effort on your part. Therefore, following an expert guide can work wonders in your favor and you can keep the skill for life. Here are knots you can easily learn using paracord and chances are they will come in handy when you are outdoors camping. Knot 1: The cobra knot The cobra knot is widely used by military personnel. Whenever a pull-ring is attached to it, the knot is perfect to be used as a Girth Hitch. See also: YouTube: Tying It All Together The cobra knot is a very easy tie to learn. Your first step is to gather two different paracords to make the knot. Materials you need are: A sharp knife A buckle Cigarette lighter 2 different colors paracord Here are the simple instructions: Take both strings in your hand and hold them straight with your fingers alongside each other. Take hold of the left cord with your hand and see

My Favorite Knot

Image
Sinnets—what exactly are they? Sinnets, similarly, are somewhere between braids and plaits. A sinnet is a woven structure, frequently having several cords or strands, and usually adaptable to incorporating several colors and patterns. Sinnet is variously defined elsewhere as braided cord, plaited cord, or simply cords woven over and under each other. What seems important to me to understand is that sinnet is woven by making alternating passes of one cord (or several cords as part of a bundle) over and under the remaining cords in the bundle to form a flat, round, or other-shaped cross-section rope or long piece of ropework that is decorative, especially if made with several colors. A sinnet is therefore a structure that lends itself to multiple strands being woven together into multiple patterns and shapes, with a relatively simple repetitive activity of over and under. As with all seemingly simple pieces however, there are cautions. It can be easy to “drop a stitch” in making multipl

IDEAS TO MAKE IT YOUR OWN

Image
While my passion dictates there can never be too many knots, sometimes for aesthetic purposes, less is more. You will need to decide. I would advise a tentative application at first, until you see what the effect is, so that you can determine how much you want to see and embellish this object of your desire. Experiment with color, thickness, type, mixture, texture, and form until you are more familiar with the base on which you are working or the stand-alone object you create. From this you may then determine (or perhaps you knew all along!) what would be most suited to your task, so that you can feel confident in creating your own masterpiece. Decorative knotting is my unbridled passion—I cannot get enough of decorative knots! Along the way, I learned several techniques when I had no idea what this passion might involve. I have found new and exciting tools to use. I have come across cords and twines in the most unusual places, and a visit to a museum usually involves me traipsing off

General Principles of Knot Tying

Certain general principles govern the tying of all knots and apply to all types of materials. 1. The completed knot must be firm, and so tied that slipping is virtually impossible. The simplest knot for the material is the most desirable. 2. The knot must be as small as possible to prevent an excessive amount of tissue reaction when absorbable materials are used, or to minimize foreign body reaction to nonabsorbable materials. Ends should be cut as short as possible. 3. In tying any knot, friction between strands ("sawing") must be avoided as this can weaken the integrity of the knot. 4. Care should be taken to avoid damage to the material when handling. Avoid the crushing or crimping application of surgical instruments, such as needleholders and forceps, to the strand except when grasping the free end of the weave during an instrument tie. 5. Excessive tension applied by the weaver will cause breaking of the knot and may cut tissue. Practice in avoiding excessive tensio

Cat’s Paw Knot Tutorial

Image
A secure knot for attaching a line to a hook is the cat’s paw, which can be tied in the hand, then slipped onto the end of the hook. Start with a large bight of line, and fold the top of the bight over onto the standing parts (1) to form two bights. Begin twisting the bights inward toward each other (2). After making at least two complete twists, place the tops of the bights together and position them on the end of the hook (3). Pull the free ends to snug up the twists, and ensure that there is no space in the top of the bights around the hook (4) This is a great way to hang your planters or anything you need to hang from a hook.

How to Make any Awareness/Support Ribbon

Image
Chart of Cancer Awareness Colors from Choose Hope Introduction: How to Make an Awareness/Support Ribbon Square knotting makes an ideal base for a ribbon. I started with two 5' lengths of 325 Paracord. You will also need a metal split ring. Step 1: About 7" from the bottom start the square knotting around the two cord core.   Step 2: Make 3 square knots. This will form one tab end of the ribbon. You can make more or fewer knots to vary the length of the tab end. Step 3: Now make a square knot (two steps) but do NOT include the right hand cord of the core you are tying around. Step 4: Begin tying again. The reverse side of the ribbon should show the cord you did not tie around.

A Beginner’s Guide to Paracord Bracelets and Projects

Image
Paracord! : how to make the best bracelets, lanyards, key chains, buckles, and more Paracords are beautifully colored flexible ropes usually used as parachute. In recent times, many persons have shown great interest in these beautiful ropes because of their flexibility to be knotted into creative projects such as bracelets, jewelries, watches, belts, lanyards etc. In this article I will be showing how to make beautiful paracord knots and how to maneuver them into amazing projects. Wearing jewelry is essential to helping women developed their own style. For women wishing to create a look that's unique, the last thing they'll want to invest money in is mass produced pieces of jewelry. It's for this reason alone, learning the skills needed for making beaded jewelry and paracord bracelets could prove extremely beneficial. When it comes to making such pieces you need to know where to purchase the right kinds of supplies. In this article, not only do w

Live Chat