Posts

Showing posts with the label paracord

General Principles of Knot Tying

Certain general principles govern the tying of all knots and apply to all types of materials. 1. The completed knot must be firm, and so tied that slipping is virtually impossible. The simplest knot for the material is the most desirable. 2. The knot must be as small as possible to prevent an excessive amount of tissue reaction when absorbable materials are used, or to minimize foreign body reaction to nonabsorbable materials. Ends should be cut as short as possible. 3. In tying any knot, friction between strands ("sawing") must be avoided as this can weaken the integrity of the knot. 4. Care should be taken to avoid damage to the material when handling. Avoid the crushing or crimping application of surgical instruments, such as needleholders and forceps, to the strand except when grasping the free end of the weave during an instrument tie. 5. Excessive tension applied by the weaver will cause breaking of the knot and may cut tissue. Practice in avoiding excessive tensio
Cat’s Paw Knot Tutorial

Image
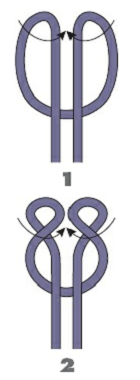
A secure knot for attaching a line to a hook is the cat’s paw, which can be tied in the hand, then slipped onto the end of the hook. Start with a large bight of line, and fold the top of the bight over onto the standing parts (1) to form two bights. Begin twisting the bights inward toward each other (2). After making at least two complete twists, place the tops of the bights together and position them on the end of the hook (3). Pull the free ends to snug up the twists, and ensure that there is no space in the top of the bights around the hook (4) This is a great way to hang your planters or anything you need to hang from a hook.

How to Make any Awareness/Support Ribbon

Image
Chart of Cancer Awareness Colors from Choose Hope Introduction: How to Make an Awareness/Support Ribbon Square knotting makes an ideal base for a ribbon. I started with two 5' lengths of 325 Paracord. You will also need a metal split ring. Step 1: About 7" from the bottom start the square knotting around the two cord core.   Step 2: Make 3 square knots. This will form one tab end of the ribbon. You can make more or fewer knots to vary the length of the tab end. Step 3: Now make a square knot (two steps) but do NOT include the right hand cord of the core you are tying around. Step 4: Begin tying again. The reverse side of the ribbon should show the cord you did not tie around.

Crafting with Paracord

Image
CREATIVE PROJECTS USING PARACORD Since paracord is so versatile, anyone can have the chance to try and make something for their loved ones. Just a few items I have done with paracord.   Heart Key Fob Materials: 6 feet of 425 paracord Heart shaped split ring Round split ring Beads optional {Cost for this project starts at $3.50} Step 1: Fold your paracord in half. Insert the center of the cord down through the heart split ring. If you are using beads, thread one on the right cord now. Step 2: Insert both sides of the cord down through the loop in the center of the cord and pull tight. Position at the bottom left side of the heart ring. Step 3: With the right cord, insert the end down through the heart and bring it up through the loop it created. Pull tight. Repeat the process until both ends return to top of ring, locking it in. Step 4: Bring the same end up through the heart and down through the loop it created. Pull tight. Bring the working ends down through the center of the cor

DIY Paracord Bracelets

Image
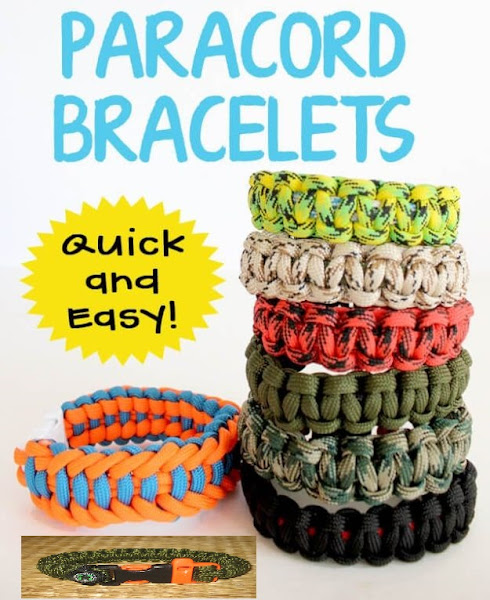
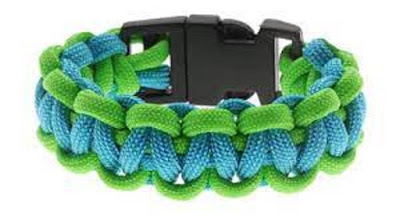
DIY Paracord Bracelets Quick and Easy DIY Survival Paracord Bracelets When it comes to paracord survival bracelets, I think DIY is the best way to go when you want something unique but cool. Learning how to make a paracord bracelet is fun and rewarding, too. Plus, a handmade paracord bracelet can make a nice DIY gift idea. Learn how to tie and wrap the cord to make different styles of paracord bracelet projects, all complete with instructions and step by step tutorial. For DIY survival gear, start with one of more of these colorful and practical wearables. A cool teen or kids craft, but plenty of fun fo adults to make, too. Learning how to tie all sorts of new bracelet knots is useful, too. Check out some ideas on YouTube and find one or more to make this weekend. Parachute cord also called paracord was invented by the military during World War 2. It’s breaking strength is over 550 lbs. Paracord is made with nylon which won’t mold or rot, and it’s durable, virtually indestructable and

Knots and Lashings

Image
Easy Knot Reference

The Best Paracord Braids & Weaves Every Prepper Should Know

Image
Basic Cobra Style If you’re in a survival situation, you can use paracords to make bows, set snare nooses and triggers, go fishing and help set up a campsite. If you’re a prepper, you can keep a paracord pouch and paracord survival straps with you for any emergency situations that may require pressure or holding something in place. Why should you have a paracord bracelet and know how to tie a paracord knot? They’re lightweight, easy to carry, simple yet incredibly diverse and way more useful than your average necklace or bracelet. You can craft a custom paracord bracelet or keychain using a variety of paracord knots, paracord braids and paracord weaves with just a few inexpensive materials. Whether you’re a prepper, an outdoor enthusiast or a crafter, there are hundreds of beneficial paracord uses to choose from. What is Paracord?   Paracord is short for “parachute cord”. As the name suggests, paracords were originally created to be used for the suspension lines of parachutes, notably

How to Make Your Own Paracord Jig

Image
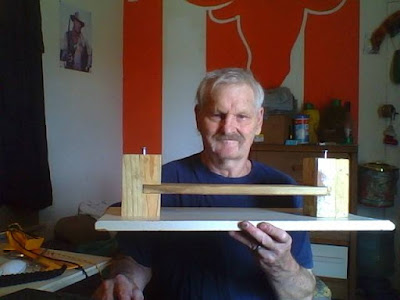
Are you a lover of paracord bracelets? And you are always not satisfied with the style and price of the paracord bracelets you see in stores? Well, with the help of a paracord jig, you can make your own just how you want it. In this article, we have put together this tutorial for a paracord jig project that you can DIY easily. The making process is pretty much basic and easy to follow. With that said, let’s start with the first step: planning a paracord bracelet jig. Planning our jig There are a few aspects worth considering when making a jig. Since it is made by you, you can customize just about everything, from the wood used, to the very functionality of the jig. If we focus on making a basic design, there are two aspects of the jig that we should consider: the width the length Width The wider the jig, the more different buckle sizes you can mount on it. This means that generally, a wider jig will have more buckle types you can use. A smart way to get around the width res

Live Chat